Private Owner Wagon Decals

Mineral Wagons

This page describes my current range of decals for private owner liveries for model railway mineral wagons. A wide variety of different liveries are available in a variety of scales. They are all derived from real railway wagons, and are intended to reproduce the original livery as faithfully as possible. Many of the liveries date from the first couple of decades of the twentieth century, so configuration options are provied to allow a livery to be modernised in various ways, to cover the period up to the British Railways steam era, when such wagons were taken into BR ownership and eventually disappeared.

Originally, such wagons were used for journeys dictated by their owners, carrying coal or other minerals. Wagons operated by the collieries or other producers carried their products to their customers, and could range quite widely over the network. Wagons operated by merchants and other end-users were restricted to journeys between the user's home location and their chosen collieries or producers.

During World War 2, private owner wagons were pooled and became "common user", that is, they could be used for any journey, not just those required by their owners. Thus any wagon could potentially be seen anywhere on the railway network.

After the war it was intended that the wagons would be returned to their original owners, but nationalisation meant that they came under British Railways ownership instead, and therefore still ranged widely over the network

Prior to the war such wagons were probably reasonably well maintained, and repainted periodically or after major repair. Wartime restrictions and shortages meant that maintainance fell to an absolute minimum, and repairs to the woodwork generally went unpainted. The situation continued after nationalisation, with wagons gradually decaying until no longer usable and were scrapped.

To help model wagons in the WW 2 and post-nationalisation periods, I offer configuration options for weathering and dilapidation. see below for full details.

The original wagon liveries were designed to fit a particular type and size of wagon. It is quite possible that a suitable kit or model for the original wagon type is not available in the scale you are working in. I therefore offer configuration options for substituting a different wagon type for which a suitable kit or model may be more readily available. I will then adjust the original livery elements to fit the new wagon type.

The range of configuration options available is quite extensive, so once I have generated the artwork for your chosen wagon in response to your order, I will send you an illustration by e-mail, for you to check and if necessary make changes before I finally print your decals and send them to you.

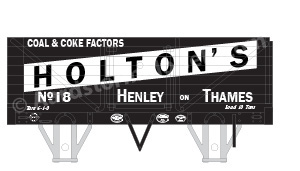
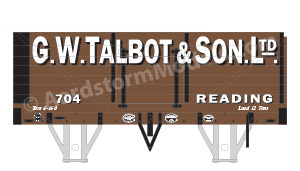
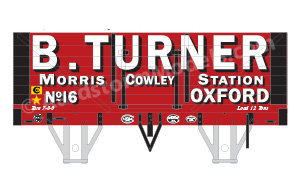
A small selection of the available wagon liveries is illustrated below, to whet your appetite. The full range is illustrated on a separate pattern selection page, available here. The range of substitute wagon types is also illustrated on a separate selection page, available here.

Note: Clicking on any of the images on this page, such as those above, will cause a larger version of the image to appear in a new tab or window of your browser (depending on how your browser is set up).

My initial range of liveries concentrates on merchant's wagons for the eastern core of the GWR territory, i.e. Berkshire, Oxfordshire and Gloucestershire, plus a few extras, as the books I started with to find livery information were for lines in this area. I also have a lot of books covering other areas and colliery wagons. The next planned batch of liveries will be for South Wales collieries. Other colliery and merchants' areas will then follow.

If you want a specific livery that is not currently part of my standard collection, I may well already have the necessary information to produce suitable decals. Please contact me with details (preferably identifying a source book containing the information) and I'll see what I can do to add the decals to my range. If I don't already have the necessary information, are you able to supply it (at least a clear photo)? I will also gladly prepare custom decals for a fictional wagon livery, such as for the coal merchant of your fictional model railway station.

Terminology

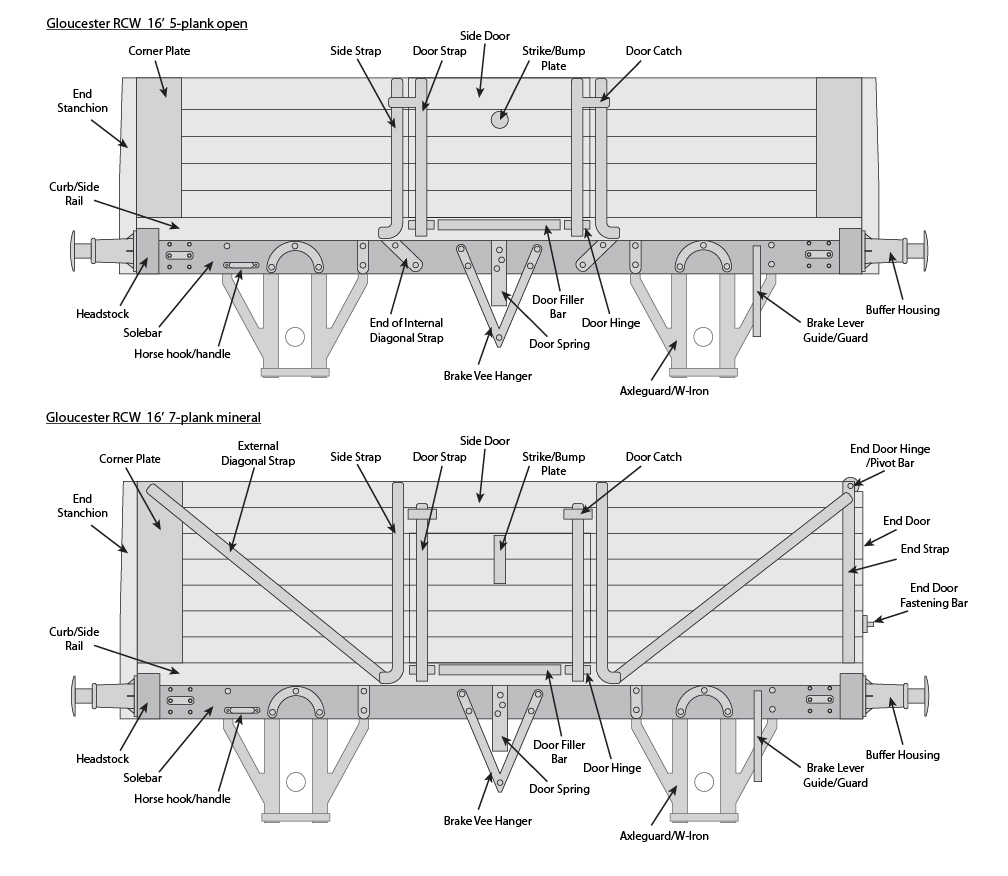
To help wih the terms used in the descriptions below, the following diagram identifies the major components of a typical open or mineral wagon, with wooden body and underframe.

I draw a distinction between open wagons and mineral wagons, although both types as private owner wagons were used to carry minerals such as coal and coke:

  • An open wagon is one with drop-down side doors that extend the full height of the body sides, and does not have end or bottom doors. It is thus identical to the wagons used to carry general merchandise.
  • A mineral wagon is one with side doors for which the drop-down part stops short of the top of the body sides. It may have additional door(s) above the drop-down part that could be hinged at the sides or open vertically. Otherwise the topmost planks continue uninterrupted across the door opening. Mineral wagons may also have a door at one end, opening the full width and height of the wagon body and hinged at the top, and/or doors in the floor of the wagon. Such wagons were generally only used for mineral traffic.

The Decals

A set of decals will consist of a number of individual decals, each type of which are illustrated in the following image:

  • A decal for each side of the body of the wagon. Note that for a wagon with an end door, the sides are different, one having the door on the right (as shown), the other on the left. The other livery elements are adjusted accordingly.
  • A plain decal for each end of the wagon.
  • A decal for each solebar, excluding the headstocks.
  • A decal for the face and ends of each headstock.

The decals will be printed onto decal paper with a white backing film, up to A5 in size for ease of posting. Decals for the largest scales may need more than one sheet, and/or the decals may need to be divided into sections to fit. Where space is available, a spare of each decal will be provided for you to experiment with, or in case of problems during application. Full instructions for applying my decals will be provided with your first order, or are available here.

It is up to you whether you apply the decals in one piece, as designed, or cut them into smaller sections. One piece applicatiopn is probably practical in the smaller scales, where raised surface detail on your model is sufficiently shallow to not cause problems with the sit or distortion of the decals. In the larger scales such detail is likely to be high/thick enough to significanly "shorten" a one piece decal because of the extra length needed to wrap it around the projections. It is therefore likely to be better to cut the decals into sections along the edges of such details. Where lettering or other livery elements crosses a projection, you will need to fill the resulting gap between decal sections with appropriate paint to link the livery elements on either side.

Small projections such as bolt heads can usually be allowed to pierce through the decal during application. Once the decal is in position, press down firmly on the projections using your finger or a soft pad (such as kitchen paper folded on itself several times). Be sure to apply only vertical pressure; sideways pressure will cause the decal to slide out of position. Piercing of the decal can be assisted, if necessary, by using the tip of a sharp knife : either a single small "prick", or a small cross. Larger, but still small, projections can likewise be accommodated by small cuts during application. Cuts of significant length are best achieved by rocking the blade of a small round knife along the cut, rather than dragging the point of a straight knife.

Please also note the following:

  • The "© AardstormModels.com" watermark in the livery illustrations will not be present in the decals; it is there to discourage people downloading and printing my designs for themselves.
  • The overall size of each decal is slightly enlarged, with cutting guides provided to mark the actual size. This reduces the risk of any slight misalignment of your cut resulting in the inclusion of white background.
  • The body side decals are extended so that the corner plate(s) can wrap around the ends of the wagon, thus avoiding having edges of the decal at the corner. In the smaller scales it may be practical to apply the decals in this way. In the larger scales it is probably better to cut the corner plates from the rest of the side and apply them separately, if at all.
  • Plank edge detail, as seen in the livery and wagon type illustrations, is not present in the decals, unless you select certain weathering options. This is in case the plank detail on your model doesn't exactly match that in the design. Cutting guides are provided instead, in case you wish to cut the decals into sections horizontally to aid application; it minimises the appearance of decal edges if they coincide with surface detail.
  • Ironwork edge detail is similarly omitted, again unless you select certain weathering options. Ironwork is therefore normally only included if it is picked out in a different colour in the design. Ironwork on the solebar decals is omitted altogether, even if a different colour, in case the positions don't match your model. Such details also often have significant height from the solebar surface, sufficient to cause problems if the decal were appplied in one piece, even in the smaller scales.
  • Cutting guides are again provided to mark the positions of the ironwork in case you wish to cut the decals into sections vertically; the appearance of the decal edges is minimised if they coincide with the physical surface detail. The guides for each ironwork strip are linked together to indicate the width of the strip. If you do cut the decals in this way, it is up to you whether you make your cuts along the centre of the strip, or along one or both side.
  • The solebar decals for wooden underframed wagons are extended up to floor height. The curb rail usually significantly overlaps and is separated from the top of the solebar in such wagons. Additional cutting guides are provided at curb rail level, in case your model doesn't include this recess behind the curb rail.
  • The end decals will need to be cut vertically into sections to fit between the end stanchions of the fixed end, or for the door end, vertically to fit between the vertical strapping and horizontally to fit around the end door fastening bar. An overall width of 8 ft is assumed; some wagons are narrower (7 ft 6 in. was common for earlier wagons). It is up to you to work out where such cuts need to be made, to match your wagon, but cutting guides are provided for the corner plates and typical stanchion positions, and at 6 inch intervals to help with the vertical cuts.
  • The end headstock decals include the headstock ends; it is up to you whether you wrap the decals around the ends, or cut the ends off and apply them separately (if at all). If the ends of your headstocks are tapered, you will have to cut the ends off. You will also need to cut the headstock decals into sections to accommodate any end stanchions and the buffers and couplings; cutting guides are provided to mark these features (assuming 10 inch widths for the buffers and coupling mount).

Configure Your Decals

To order a set of decals for a private owner wagon you will need to configure its specification. This will consist of a number of steps, as described below.

To accommodate a wide range of scales, wagon dimensions are specified in scale feet and/or inches, rather than model mm. A calculator and look-up table to help convert scale inches into model dimensions (or vice versa) is available here (opens in new browser tab/window).

Note: If you want a set of decals for a wagon that is not covered by the standard options below, I will be happy to quote you for a customised set. Please contact me with full details.

1. Wagon Livery

The first step is to select a livery for your wagon. With a large number of liveries available, this is done by visiting a separate livery selection page, which shows each livery available, along with information about the prototype. Click on the button there associated with your chosen livery to select it and return to this page. This will also set default values for some of the configuration options below, which you can then change if you wish.

Warning: If you visit the livery selection page after you have started to change any of other settings below (not just the livery settings), you are likely to lose those changes. Either select the livery first, or use this button to save your other settings before visiting the selection page.

No Livery Currently Selected

2. Wagon Type

The exact wagon type associated with your chosen livery may not be available as a standard kit or model in your scale. Therefore you can select an alternative wagon type that is available, and I will adjust your chosen livery accordingly (so if possible please choose a wagon similar in size to the original). Again with a large number of wagon types available, this is also done by visiting a separate wagon selection page, which shows each type available, along with information about the prototype. Click on the button there associated with your chosen type to select it and return to this page.

Warning: If you visit the wagon type selection page after you have started to change any of other settings below (not just the pattern settings), you are likely to lose those changes. Either select the type first, or use this button to save your other settings before visiting the selection page.

No Wagon Type Currently Selected


3. Original Livery Adjustments

Many users of private owner wagons operated several wagons in their common livery. The individual wagons were then identified by a number painted on the wagon side. The basic livery selected above includes one such number, and the livery description gives alternative numbers, where known. You are welcome to specify a different number here, whether one of those known or something different:

Note: If you do specify a different number, the short description for the decals once added to your basket will still reference the original number (to help me identify the original livery). The new number will appear as part of the detailed description in your e-mail acknowledgement (and be sent to me) if you place the order.

The tare weight of a wagon (it's weight when empty) could vary slightly even between wagons of identical construction. You are welcome to specify a different weight here:

Private owner wagons were generally fitted with several cast plates, usually on the solebars, but sometimes on the body side:

  • Registration Plate: Wagons had to be registered with a railway company, and were assigned a registration number. As well as this number, the registration plate also identified the maximum load the wagon was approved to carry, the year of registration, and the railway company. The registration number, and presumably plate, remained with the wagon for the rest of its life, at least up to nationalisation.
  • Builder's plate: Wagons often carried a plate identifying the original builder of the wagon. Such plates often included the year the wagon was built.
  • Owner's Plate: Many end users, especially smaller companies, did not buy their wagons outright, but hired or leased them from a larger company, often the same company that built the wagon. Such wagons carried a plate that identified the owner, and also contained a number assigned by that owner.
  • Repairs Plate: Some wagons carried a plate that identified who was to be contacted if repairs to the wagon were needed. This was originally usually the owner or builder, but once the Wagon Repairs Limited company was formed in 1918, this rapidly took over the wagon repairs business from the original builders. Their plates sometimes identified one of their depots too. Configuration of a Wagon Repairs Ltd. plate is covered in the modernisation section below, even if fitted as originally built.

The photos I've worked from to produce these wagon liveries are generally not clear enough to show most of the details on these plates. Some details (e.g. construction date, load weight, railway company) can be deduced from other information. Otherwise I've made a guess; in particular I've used random numbers for the registration and owner's numbers. You are welcome to specify these numbers here, or if you change the painted wagon number, I'll change the random numbers a little too. In the smaller scales, the contents of most plates will be illegible (other than as vague shapes) anyway.

4. Modernisation Options

Most of the liveries in my collection date from before 1920, the remainder from the 1920s and 30s. Where I have information about when the user ceased trading, or was taken over, I indicate this as well as the year of construction, for those who want historical accuracy for their model. Otherwise it is assumed the wagon liveries remained in use largely unchanged for many years, and I offer a number of options for updating a livery to a later period. These options are divided into three periods and illustrated in the following images:

1920s-30sWW 2Post-Nationalisation

1920s/30s


 These will be placed towards the bottom left corner of the sides, as appropriate for other livery elements in the area.


The door stripes can be positioned "under" the other livery elements, as if painted on during a complete repaint, or they can be positioned "over", as if painted on later. The 1920s/30s illustration above shows the "under" type, while the WW2 and BR illustrations show the "over" type.

The bottom door stripes can optionally include a black background patch, as shown in the BR illustration above.

World War 2

The pooling of wagons and general lack of maintenance and repainting meant that the original livery elements gradually disappeared. Since it was intended that the wagons would be returned to their owners after the war, when key elements of the livery deteriorated too far, they wre refereshed by adding a black panel in the lower left corner nad the information painted on top in white.

Add panel(s) with:        

The full set of additions are shown in the WW2 illustration above.

Post-Nationalisation

After nationalisation, instead of being returned to their original owners private owner wagons were taken into British Railways ownership. The wagons were given a new number with a "P" prefix, which was painted on a black panel in the bottom left corner of each side, in the standard way as for other, previously railway-owned wagons. Other information was also added in the same way, in the standard locations and format: load weight above the number, tare weight towrds the bottom right corner. Owner's and repairs plates were generally removed too.

 Enter BR "P" number here, if required. The other values will be taken from the selected livery/wagon data.

To add end/bottom door stripes to a nationalised wagon, please use the 1920s/30s options above.

5. Weathering Options

In use and between repaints, real wagons would gradually accumulate grime from the loads they carried (e.g. coal dust) and brake dust from their own underframe. The original painted finish would also gradually fade from the action of the weather. The best way to simulate this in a model is to apply appropriate colours on top of the pristine finish using an airbursh (best for "dusty" effects) and/or washes of thin paint – thin paint will naturally accumulate in recesses (e.g. grooves between planks) and around raised detail (e.g. ironwork).

If you do this to your wagon, paint it to a pristine finsh first, apply the decals, and touch up the decal edges and any gaps. Allow to dry thoroughly (several days), then be sure to protect the finish with (matt) varnish or lacquer ‐ two thin coats are better than one thicker one, to minimise the risk of the decals lifting at the edges.

Again allow the varnish to dry thoroughly (especially if you are going to use washes of paint), then apply the weathering effects. Go slowly, applying colour thinly in multiple stages, allowing each stage to dry before proceeding to the next. Continue until you acheive your desired effect.

For those who do not wish to go to this trouble, I offer some short cuts by incorporating weathering effects into the decals. This is done in two basic ways: fading the original colours, and applying grime effects. You will have to modify the paint you use to touch up the decals by adding small quantities white, greys, and/or black, to match the colours of the decals. You will also still neeed to apply weathering effects using paint to those areas of your model that do not have decals applied, such as below the solebars and the buffers and couplings.

The strength of the weathering effect is specified as a number from 0 (no effect) to 4 (maximum), separately for fade and grime. These options are illustrated in the images below, for the three most common wagon colours.

Weathering effects can also be specified in 3 stages, corresponding to the modernistaion stages above:

  1. Prior to WW 2
  2. WW 2
  3. Post nationalisation

Effects applied for the later stages are not cumulative, they are only applied to the modernisation options implemented at that stage. Thus the weathering specified for stage 1 gives the final appearance of the original livery, plus any 1920s/30s modernisation options. Any WW 2 modernisation options are then applied and the stage 2 weathering specifies their final appearance. Similarly, any post-nationaisation modernisation option are finally applied, and the stage 3 weathering specifies their appearance. Stage 1 should therefore be set to the strongest effect, with stages 2 and 3 progressively weaker.

Fade

Grime

The grime levels are illustrated in conjunction with a level 2 fade.

6. Dilapidation Options

The dilapidations considered here are the replacement of planks during major repairs. Prior to WW 2 it is assumed that such repairs would result in a repaint of the wagon, and thus not be visible on the outside if the wagon. During WW 2, the wartime restrictions and shortages meant that new planks would be left unpainted, except for patches for key information (as described in the mordernisation options above). This practice continued after nationalisation, except for the addition of BR standard lettering.

The dilapidation options available for my decals therefore represent the replacement of selected planks with unpainted ones. It is assumed that planks would be replaced in their entirety, not in smaller sections. The illustrations below show the available plank colours, and their interaction with weathering options, for fade and grime. The grime illustration also includes a level 2 fade.

You can specify which plank(s) are to be replaced using a code of letters and numbers:

  • The first letter indicates the wagon side (A or B) or end (D or E). For a wagon with an end door, side A has the door on the right. End D is that with the door, E is the fixed end. For a wagon without an end door, end D is to the right of side A, E to the left.
  • The next number indicates which plank: plank 0 is the curb rail, plank 1 is the bottom plank, with the remaining planks counting upwards. To specify a block of planks togther, use the lowest and highest plank numbers separated by a hyphen.
  • The next letter identifies the position of the plank(s) along the side: L to the left of the side door, C on the door itself, R to the right of the door. Planks that extend the full length of the side or on the ends, should be specified as F.
  • The last number indicates the base colour of the plank before weathering is applied, 1 to 8 as shown above.

For eaxample:

  • a2r5 specifies side A, plank 2, right of door, colour 5
  • B3-4L2 specifies side B, planks 3 to 4, left of door, colour 2
  • A4C1 specifies side A, plank 4, on or over door, colour 1
  • b7f3 specifies side B, plank 7, full length, colour 3
  • D1F4 specifies end D, plank 1, full width, colour 4
  • e2-4f5 specifies end E, planks 2 to 4, full width, colour 5

The upper/lower case of the letters is not important.

You can also specify two groups of repairs: during WW2 and post nationalisation. The WW 2 repairs are applied after stage 1 weathering, but before WW 2 modernisation options and they are subjected to stage 2 weathering. Similarly, post-nationalisation repairs are applied after stage 2 weathering but before post nationalisation modernisation, and are then subject to stage 3 weathering.

To specify multiple groups of repairs at either stage, separate their codes with commas and/or spaces.

7. Confirm Configuration

Finally, please specify the scale for your decals, together with a short label (name and/or number) that can be used to distinguish this wagon decal configuration from any others you may add to your basket:

The uniqueness of this label is important because if you add two different wagon decal sets with the same label to your basket the more recent specification will overwrite the old. You can, however, use this feature to update the specification of decals you have already added to your basket. The label you enter will be automatically prefixed with "POWagonDecals ".

Once you have selected the appropriate options above to configure this decal set, click on "Confirm Configuration" above to proceed to the next stage of the ordering process. (This will also temporarily store the information you've entered should wish to navigate away to another page, as will the "Save Settings" button above.) You will then be taken to another page showing the information you've entered. From there, you will then be able to either add the set to your basket, or return to this page to change your specification.