
Decals for GWR Coach Window Labels
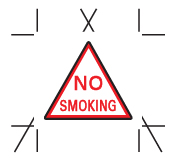 |
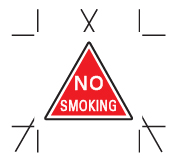 |
The earlier and later No Smoking label types. | |
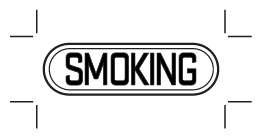 |
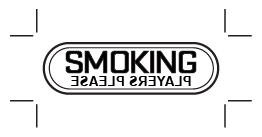 |
The 1920s-30s Smoking label types, with and without advertising. | |
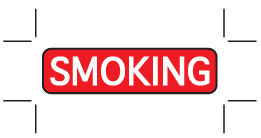 |
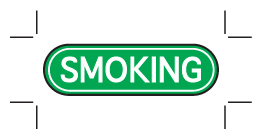 |
The earlier and later Smoking label types. | |
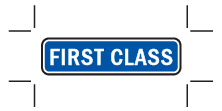 |
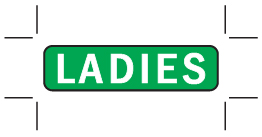 |
The 1940s First Class and early Ladies only label types. | |
These decals are for the small labels applied to coach windows by the GWR to identify special seating sections, such as smoking or non-smoking, first class and ladies only. Decals are available to cover the period from the earliest versions through to nationalisation. These labels are all derived from period photos, plus a few of preserved carriages. For the period photos I have only been able to find black and white photos, and I have also been unable to find any descriptive information. For the more colourful labels I'm therefore offering versions in a selection of likely colours for you to choose from. I have also had to estimate the sizes of the labels (see below). If anyone has authoritative information for colours and sizes (and indeed periods of use) please contact me and I'll correct my decals as necessary.
The main label decal types available (other than variations in colour) are shown on the right, complete with cutting guides. These decals can be supplied in a variety of scales, from 2mm to 16mm, and are available on either white-backed or transparent waterslide decal paper; the transparent versions have the decals reversed (left-right) for application to the inside of the windows, to appear the correct way round when viewed from outside. Note that the white Smoking labels with advertising were applied such that the "SMOKING" legend was for viewing from outside, while the advertising was to be viewed from inside.
From what I've been able to determine from photos, the periods over which the various labels were used was:
- No Smoking, red on white. 1920s–30s, and perhaps into the 1940s. Superceded by (2). The version with small lettering is from a preserved coach; period photos only show the larger lettering.
- No Smoking, white on red. 1940s onwards, perhaps post-war.
- Smoking, black on white, with or without advertising. 1920s–30s, and perhaps into the 1940s. Superceded by (4).
- Smoking, white lettering, round ends. 1940s onwards, perhaps post-war. The background colour is uncertain.
- Smoking, white lettering, square ends. ?–1920s, superceded by (3). The background colour is uncertain.
- First Class, white lettering, square ends. 1940s onwards, perhaps post-war. The background colour is uncertain.
- Ladies only, white lettering. 1890s-?. The background colour is uncertain.
For the labels of uncertain colour, the colours shown on the right are what I judge to be the most likely.
The sizes of the labels (estimated from photos) are:
- Triangular No Smoking labels, 6.5in. wide.
- Smoking labels, 12in. wide.
- Later First Class labels, 9.5in. wide.
- Early Ladies Only labels, 12in. wide.
Note that in the smaller scales the labels will therefore be tiny, making them tricky to handle and apply. The lettering is also unlikely to be legible, but should give the impression of being viewed from a distance.
As well as being applied to the outside windows of each compartment, the labels were also applied to the windows of the corridor partition, in this case "outside" meaning facing the corridor. At least in the larger scales, such labels would be readily visible from outside of the coach through the large windows on the outside of the corridor, but you will need to glaze the windows of the corridor partition.
The decals can be applied in three different ways:
- The white-backed decals can be simply applied to the outside of the windows. Although this is the simplest method, the decals will need to be carefully cut to shape, removing as much as of the black border as possible. Decals with a more complex shape, such as circular or with rounded ends, will be provided with a rectangular mid-grey surround to help make cutting out easier in the smaller scales – cut off as much of the grey as you wish.
- The transparent decals are applied to the inside of the windows, then painted on the reverse with white paint to fill in the white areas (my printer does not have white ink, so the white areas of the decal will be transparent, and colours other than black will be translucent). The decal pattern will be reversed left/right so that it appears the correct way round from the outside. The black decal border should be retained to define the edge of the label and allow for imprecise application of the paint. You may find it easier to use a drawing pen rather than brush to appply the paint, but be careful not to scratch the decal with the nib – perhaps dab the paint on in spots that merge together rather than draw the pen across the decal. The cutting guides are positioned to give a small transparent border around the label. The decals should be allowed to dry thoroughly (eg. at least overnight) before applying the paint, especially if using water-based paint. Opaque white ink can also be used instead of paint.
- The transparent decals are applied to the inside of the windows, as for method 2, then white-backed decals applied on top. The label will then then be correctly visible from the inside of the coach as well as the outside. The black border should be retained in full on the transparent decals, but reduced on the white-backed ones, to define the edge of the label as visible from the outside, while allowing for some imprecision in applying the white-backed ones. Decals with a more complex shape, such as circular or with rounded ends, will be provided with a rectangular mid-grey surround (on both the transparent and white versions) to help make cutting out easier in the smaller scales – cut off as much of the grey as you wish, a little more on the white versions than the transparent ones to allow for some misalignment and prevent the edges of the white decals appearing beyond the edges of the grey on the transparent ones. The transparent decals should be allowed to dry thoroughly (eg. at least overnight) before applying the white-backed ones, to minimise the risk of the transparent ones lifting during application of the white-backed ones.
Methods 2 and 3 will be much easier if the glazing can be installed to accurate positions, as it will then be possible to apply the decals before the glazing is installed, giving much easier access to the inside face. In this case, use of paper templates, marked with the outlines of the glazing material and window aperture, together with the positions of the labels, will help with applying the decals in the correct (and consistent) positions.
To order a set of decals you will be able to select any combination of label types you wish to fill a sheet. The number of label decals that can be fitted on a sheet depends on the scale as follows:
| Scale | No. of Labels |
|---|---|
| 16mm | 90 |
| 1:22.5 | 114 |
| 10mm | 110 |
| 1:32 | 120 |
| 7mm | 120 |
| 1:64 | 132 |
| 4mm | 132 |
| 3.5mm | 144 |
| 3mm | 156 |
| 1:120 | 156 |
| 2mm | 168 |
Decals for 16mm and 22.5:1 scales will be supplied on A5 paper, the remainder on A6.
Configure your Sheet
To order a sheet of decals for GWR window labels you will need to select one or more label types, add them to your sheet, and set the quantity you require of each. Once you've completed your sheet of decals, you can then add the sheet to your basket.
Select Labels
To add a label to your sheet as a decal, click on the Add button below its illustration.
The quantity of a decal you add to your sheet will initially be set to 20. This should be enough for a single carriage plus a few spares. For example, corridor and open coaches typically had 8 windows per side that could require labels, while suburban coaches up to 9. The 70' coaches unique to the GWR could have up to 10. If you add a decal to your sheet that's already there, it's quantity will be increased by this amount.
Once you've added a decal to your sheet, you can adjust the quantity of it you require using the buttons below.