
Railway Container Decals
The Containers
This page describes my current range of decals for liveries for model railway-owned containers. A variety of different liveries are available in a variety of scales, covering the grouping period, when the use of containers became widespread through to well into the nationalisation era, when the first generation of containers were replaced by the modern, larger, ISO standard types.
A small selection of the available container liveries is illustrated below, to whet your appetite. The full range is illustrated on a separate selection page (see below).
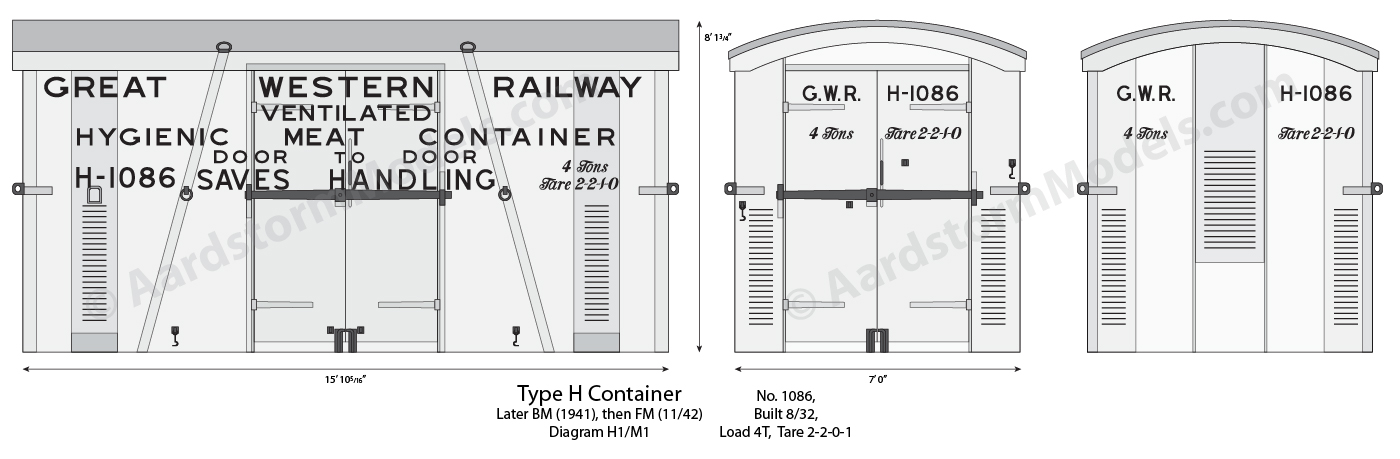 GWR type H, livery WB3 |
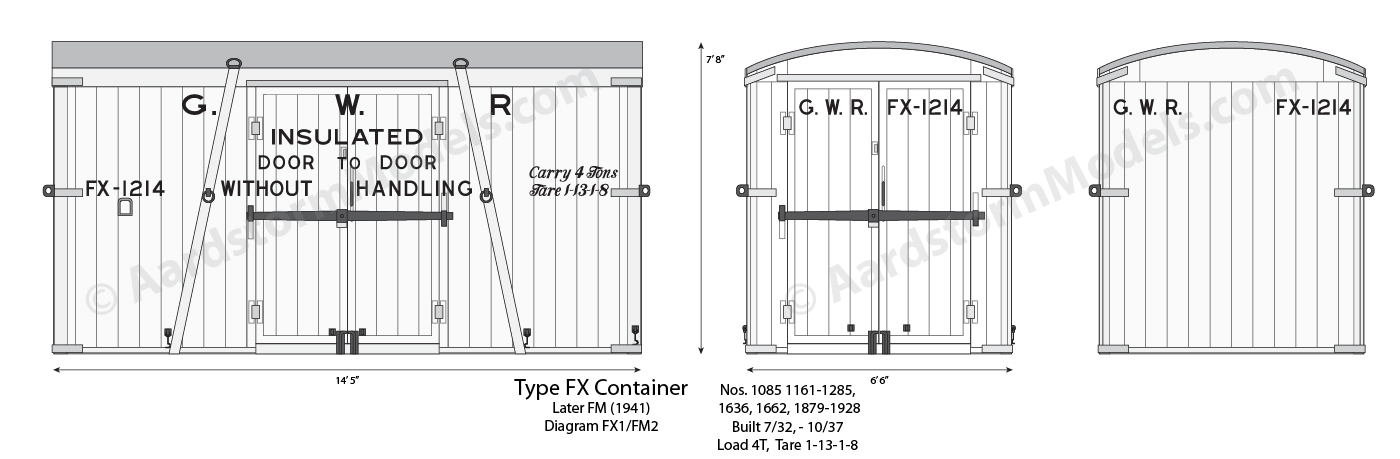 GWR type FX, livery WC3 |
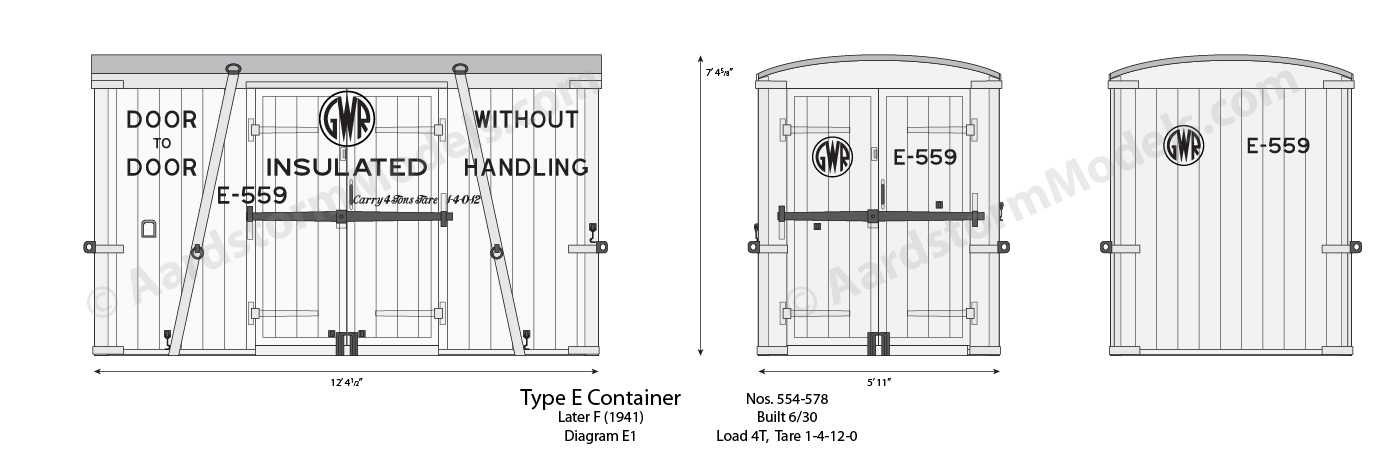 GWR type E, livery WD3 |
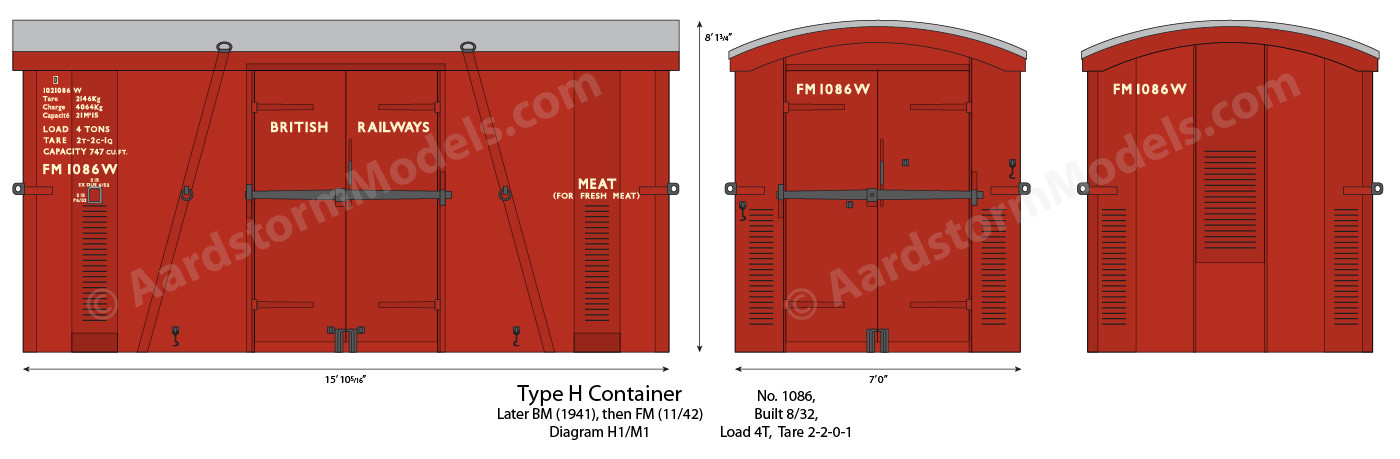 GWR type H/FM, livery 1a |
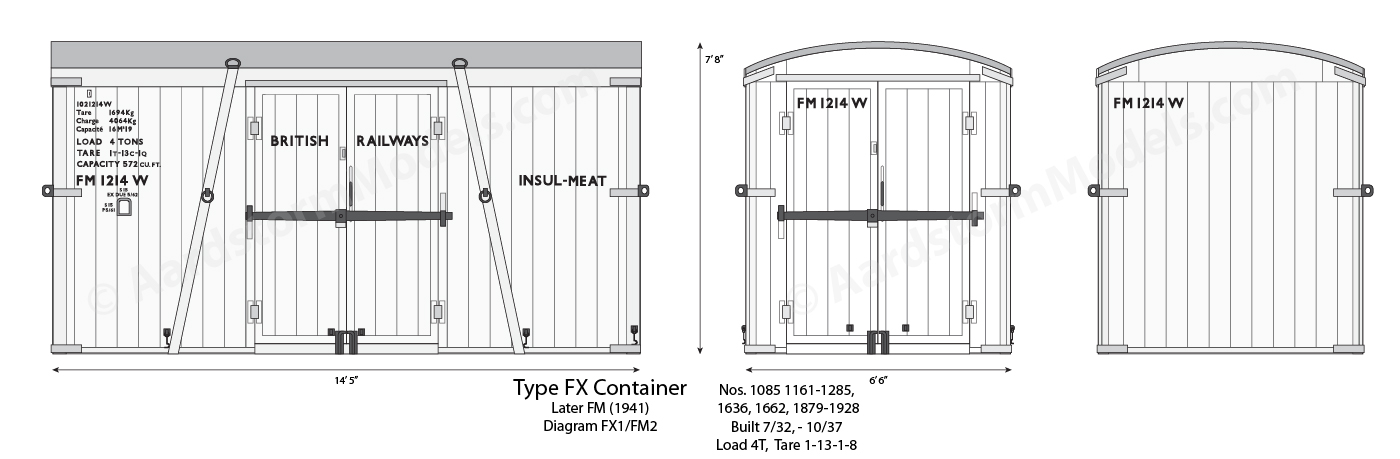 GWR type FX/BM, livery 2b |
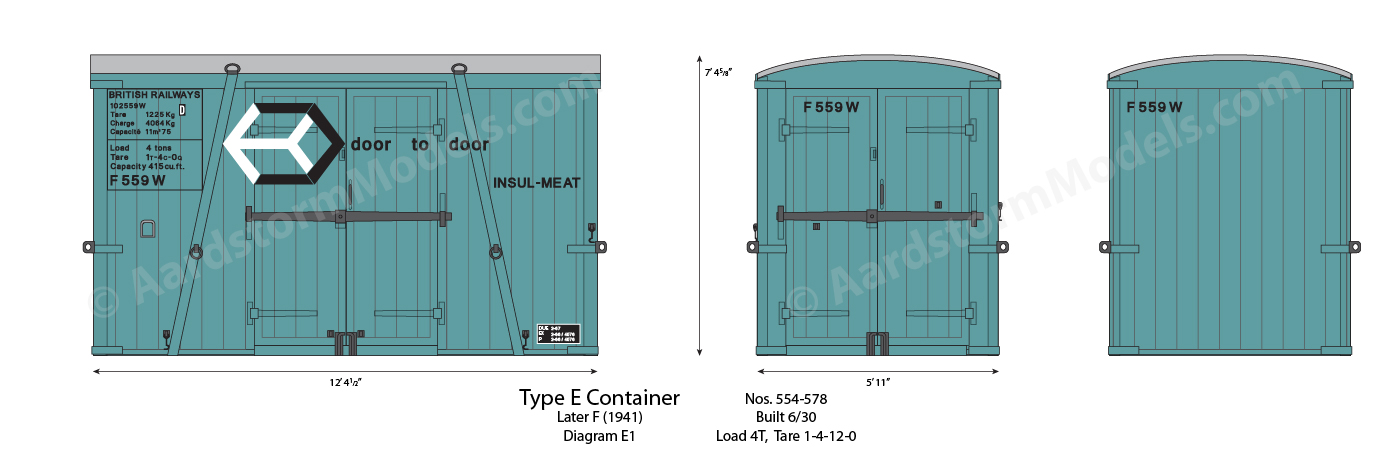 GWR type E/F, livery 3b |
Note: Clicking on any of the images on this page, such as those above, will cause a larger version of the image to appear in a new tab or window of your browser (depending on how your browser is set up). | ||
The first generation containers were developed by the grouping railway companies to carry customer's loads from door to door without intermediate handling (other than of the container itself). The containers started their journeys on road vehicles, usually railway-operated, were transported to the nearest station with suitable freight facilities (i.e. a crane), where the container was transferred to a railway wagon. Most of the journey was then completed by rail to the station nearest the ultimate destination, where the container was transferred to a road vehicle to complete its journey.
A variety of container types were developed to carry a variety of different loads, and typically looked like a railway wagon of the time without underframe and wheels. They were designed to be carried on 4-wheel flat wagons (known as Conflats), although the smaller types were often carried on normal open wagons. On the road they were carried on flat-bed or low-sided lorries or trailers.
The design, sizes and classification of the containers was gradually standardised across the grouping railway companies, so that individual containers could be easily carried across the entire railway network, not just across that of the parent company. The containers, and the wagons carrying them, were not pooled and had to be returned to the parent company.
Construction of similar container types continued under British Railways, until more modern types were developed in the 1960s, and ultimately replaced by the international standard ISO types.
Liveries
Initially the liveries used on containers was generally very simple, often based on the contemporary freight wagon liveries, with the lettering consisting of little more than identifying the parent company, the fleet number of the container, and its load and tare weights. The railway companies soon realised that the use of the containers on the roads presented a great opportunity for advertising the container service to potential customers who may not have considered hiring a conventional railway wagon. Various advertising slogans therefore appeared on the sides of containers. The slogans used changed over the years, as did the basic liveries, to follow contemporary freight wagon liveries. After nationalisation, the liveries used on containers was simplified once again, with thte removal of most, if not all, slogans.
The major livery styles used by the various railway companies for their containers are briefly summarised below. I've assigned letters to identify the major grouping era livery periods, although the number and dates of the individual liveries varies from company to company (e.g. A-E for the GWR).
For the post-nationalisation era I've assigned numbers (1-3) to distinguish them from the grouping era liveries. The dates for each livery are approximate, and it would in any case take some time (maybe years) before individual containers were repainted in the new style after a change had been adopted.
Within each livery period, different types of containers were painted differently, often different colours for the same arrangement of lettering. These style variations I've assigned a number (typically 1-3) for the grouping era, and letter (a-c) for the BR era. This all leads to a livery code to identify a specific livery:
- Grouping era: parent railway (W, S, M, or N) - period (A-...) - style (1-3) e.g. livery WB3 identifies a GWR livery for period B and style 3. Any further variations to a basic livery and style are identified with an additional letter on the end.
- BR era: period (1-3) - style (a-c) e.g. livery 2b identifies a BR livery for period 2 and style b.
GWR
Period A, pre-1929. Simple lettering on each side and end: G.W.R with number below, and load and tare weights below that in italic script.
Period B, 1929 – 1932. Great Western Railway in full on sides, G.W.R. on ends. First slogans appear, depending on container type.
Period C, 1932 – 1934. Great Western Railway repaced by G. W. R widely spaced on sides. Weights removed from ends. Revised slogans.
Period D, 1934 – c.1942. Shirtbutton GWR monogram on sides and ends. Slogans further revised.
Period E, c.1942 – 1947. During WWII general use of the monogram was aboandoned on rolling stock once supplies of transfers was used up, to be replaced by G.W.R. in normal lettering. Containers are assumed to have followed suit, but I have no evidence to confirm this. I have no photos of containers in this period, so I've used a fairly closely spaced G.W.R. initials in place of the monogram, with slogans and other details unchanged from period D.
Styles: Most containers were painted overall grey with white lettering, similar to freight stock (style 1). The first containers for the furniture removal service were painted cream and brown with black lettering against the cream (style 2a). This was soon changed to overall brown with yellow lettering (style 2b). The ventilated and insulated containers were painted overall white with (officially) black lettering (style 3). There is some suggestion that the lettering, at least on some of them, was red, similar to the Mica insulated vans. Some (b&w) photos appear to support this, with the lettering a lighter shade than other, certainly black, features. I therefore provide an option to change the lettering colour so that you can make your own decision.
GWR type H, livery WB3 |
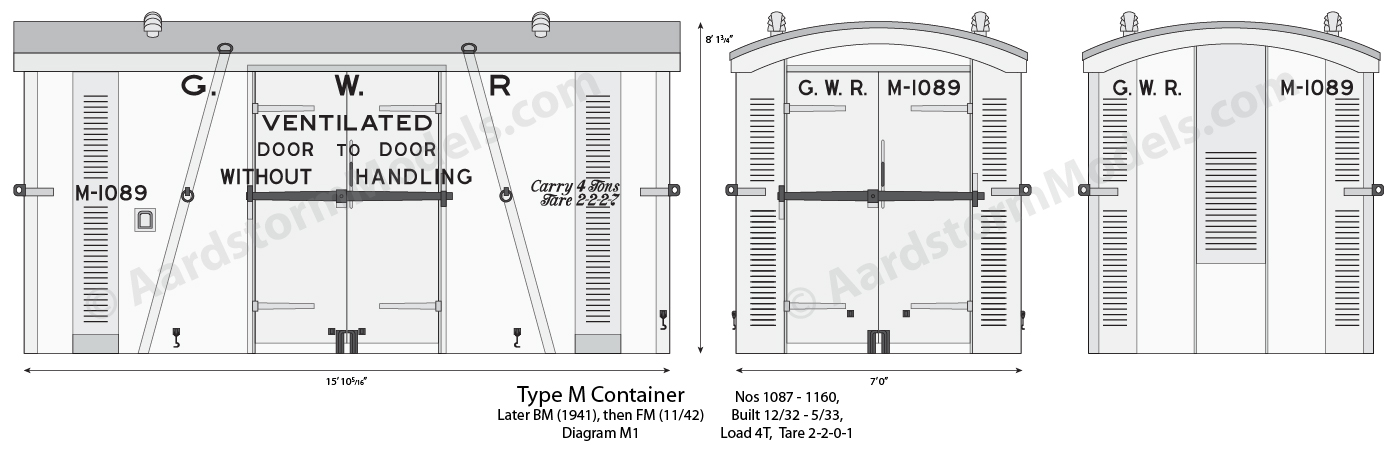 GWR type M, livery WC3 |
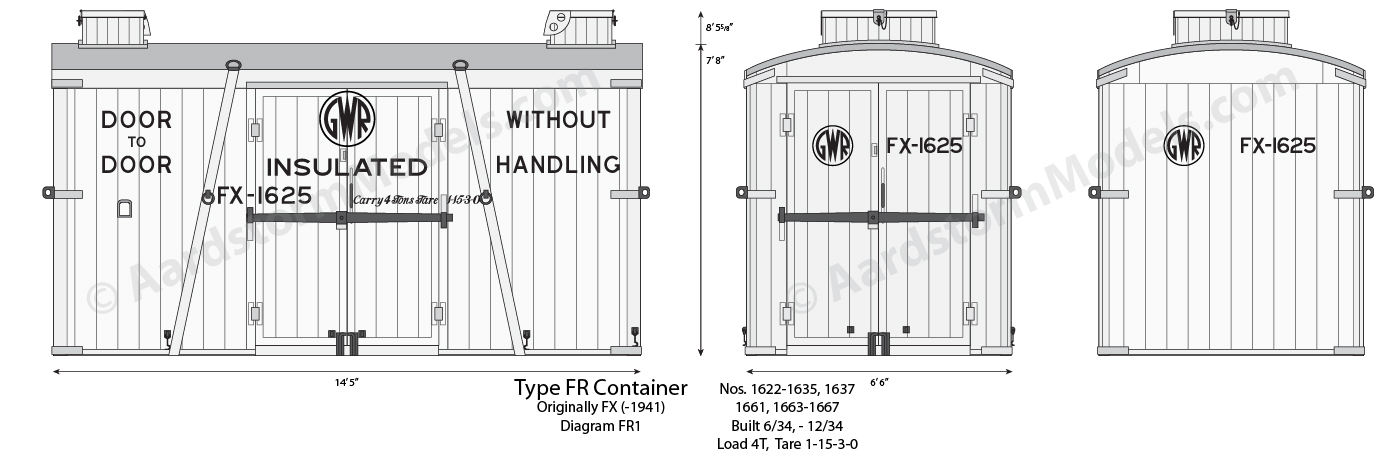 GWR type FR, livery WC3 |
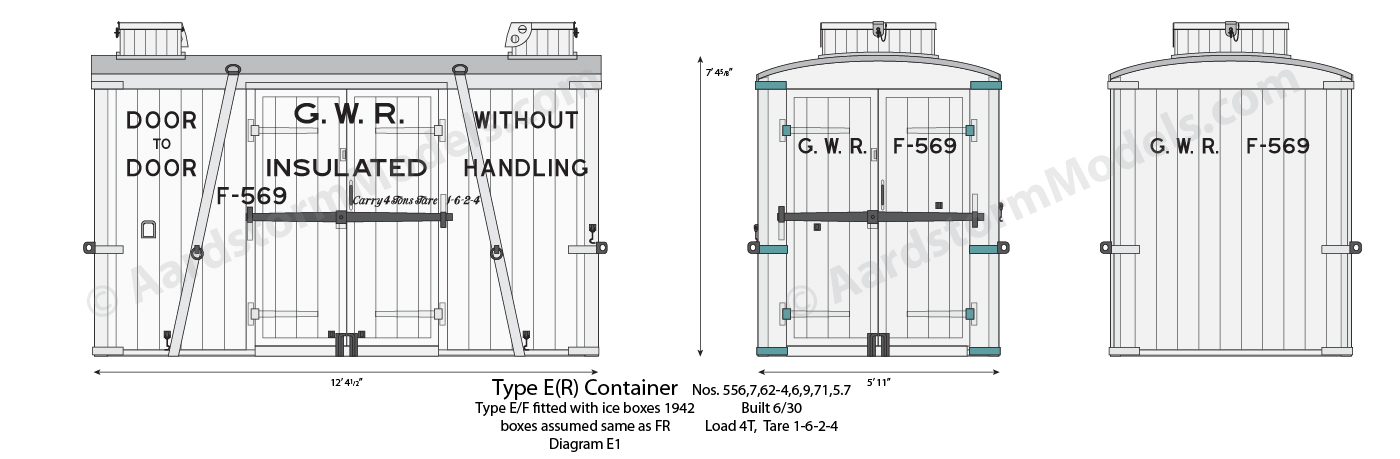 GWR type E(R), livery WD3 |
British Railways
Period 1, 1948 – 1960. Most containers painted overall crimson with straw lettering (style a). Insulated containers (not ventilated) painted overall white with black lettering (style b). Open containers and those for carrying powder materials painted grey with white lettering on black panels (style c). Standard Gill Sans lettering font. Original late grouping era numbers and prefixes retained, with the addition of region letter suffix (W, M, E, S, or B for BR-built containers) to identify origin. Most data (number, weights, volume) grouped into a panel at the top left of the sides. Data usually shown twice, in imperial and metric units (the latter with titles in French, for international use?). Simple British Railways identification on centre of sides (on doors, if any). Number repeated on ends, except for BR-built containers, which appear to have been fitted with a cast number plate. Maintenance data (paint and examination dates, along with depot code) grouped around the label clip. Some containers have a function label such as MEAT or INSUL-MEAT.
Period 2, 1960 – 1964. Crimson colour replaced by bauxite, otherwise as period 1.
Period 3, 1964 onwards. Bauxite and grey colours replaced by freight brown (both now style a). Insulated containers now painted Ice Blue instead of white, still with black lettering (style b). New lettering font. New black and white hexagonal freight logo, with "door to door" slogan. British Railways moved to top of data panel, which is now outlined. Maintenance data organised into new panel (similar to that used on contemporary freight stock) in bottom right corner of sides.
GWR type H/FM, livery 1a |
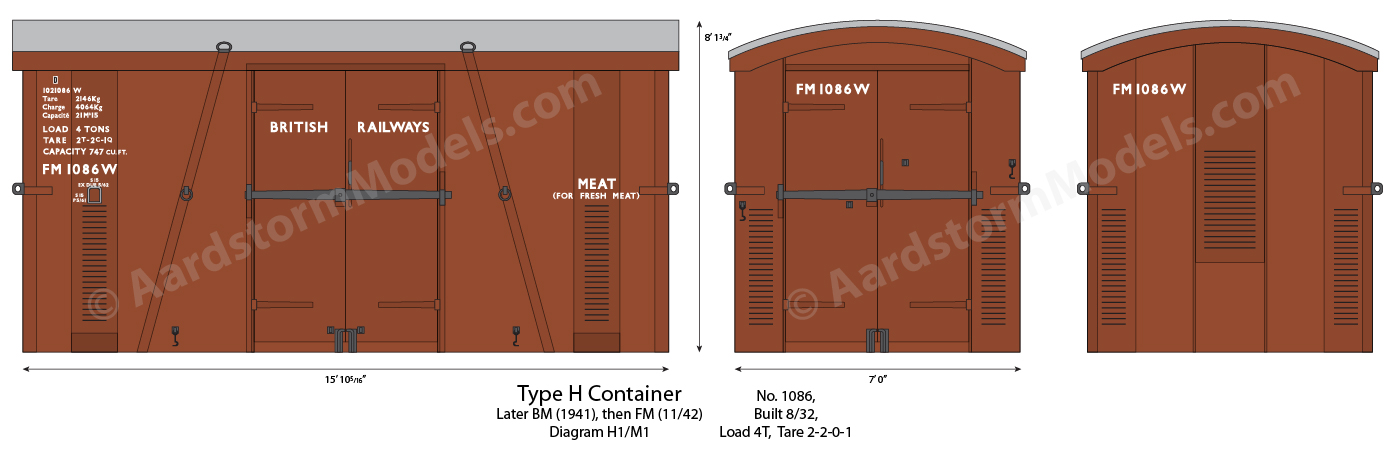 GWR type H/FM, livery 2a |
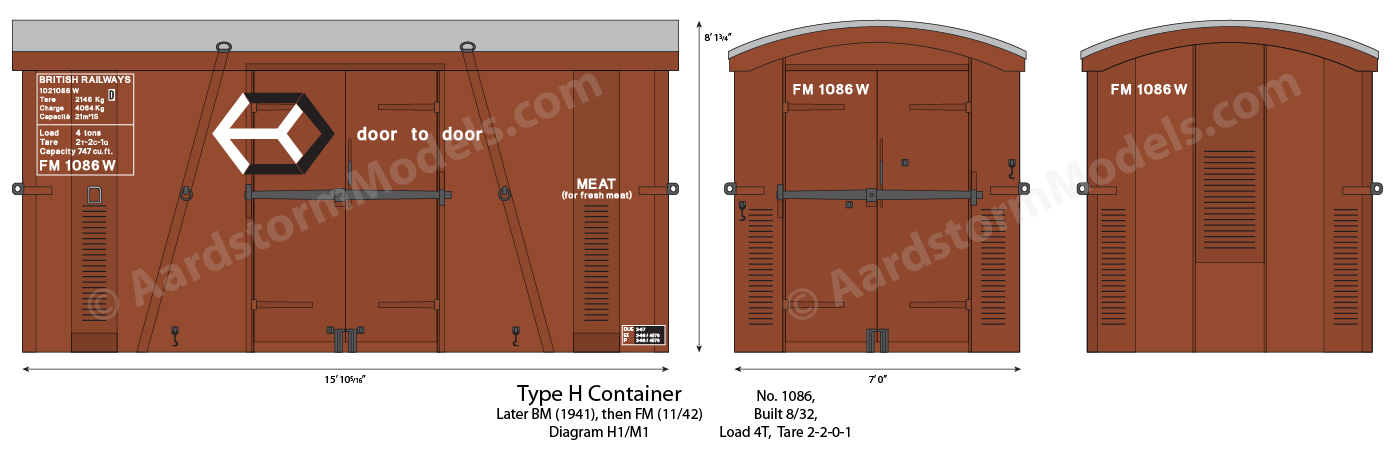 GWR type H/FM, livery 3a |
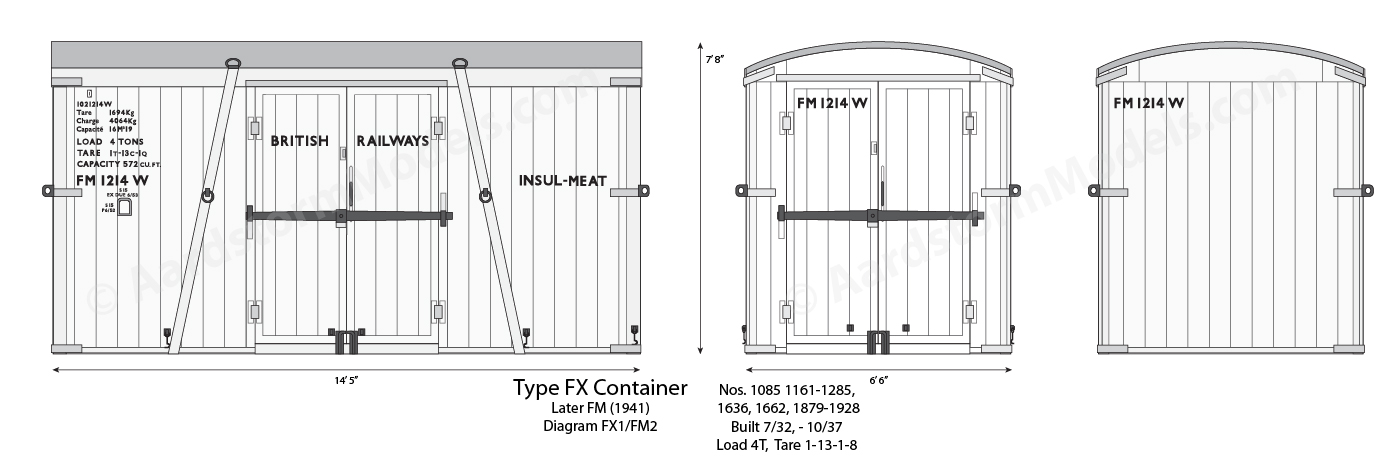 GWR type FX/BM, livery 1b |
GWR type FX/BM, livery 2b |
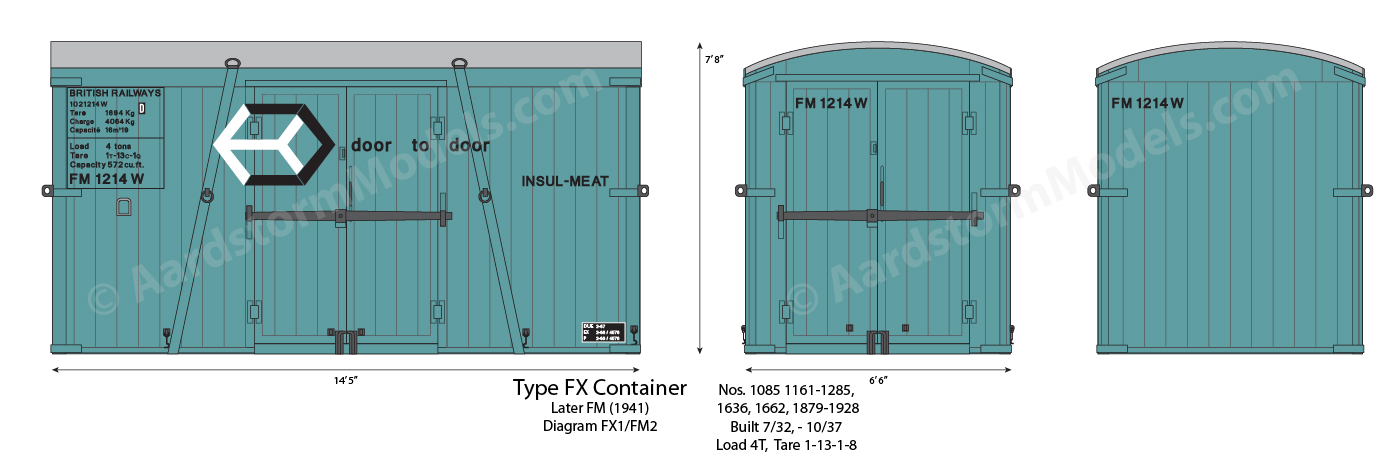 GWR type FX/BM, livery 3b |
The Decals
My current range of decals is limited to GWR ventilated and insulated container types. Other GWR closed containers should be added soon, followed by open types. SR and LNER container types should then follow in due course. Containers built by the LMS and BR will hopefully follow once I find sufficient information.
The decals are designed to fit a specific type of container with a specific livery. It is quite possible that a suitable kit or model for the original container type is not available in the scale you are working in. I therefore offer configuration options for substituting a different container type for which a suitable kit or model may be more readily available. I will then adjust the original livery elements to fit the new container type.
Options are also provided to allow you to specifiy such markings as fleet number, tare weight, and also body and lettering colours. The range of configuration options available is quite extensive, so once I have generated the artwork for your chosen container in response to your order, I will send you an illustration by e-mail, for you to check and if necessary make changes before I finally print your decals and send them to you.
If you want a specific container and livery that is not currently part of my standard collection, I may well already have the necessary information to produce suitable decals (for GWR, SR and LNER containers). Please contact me with details and I'll see what I can do to add the decals to my range. If I don't already have the necessary information (e.g. for LMS and BR-built containers), are you able to supply it (at least a clear photo and basic dimensions)?
A set of decals will consist of a number of individual decals, each type of which are illustrated in the following image (which is from an early custom decals order for a GWR type M container with red lettering on a white background, that triggered the development of my standard products. The model container was also undersize, so the side lettering is compressed vertically to fit):
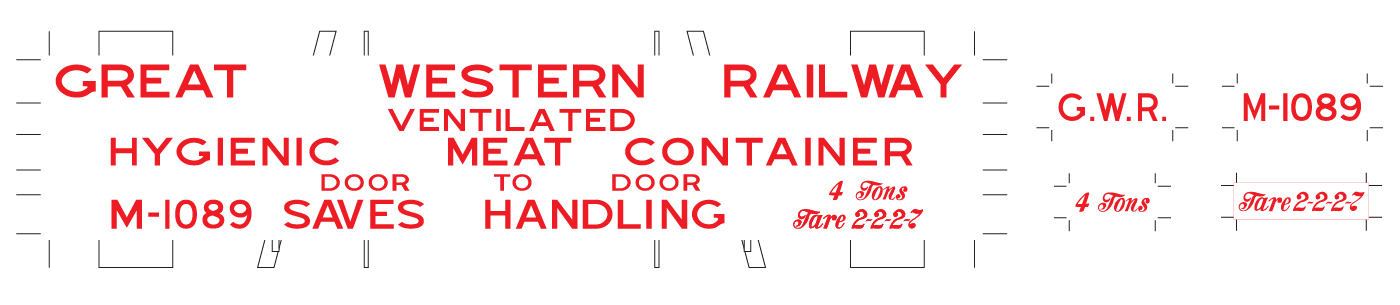
- One or more decals for each side of the container. For containers with a lot of lettering spread over a large part of the side, as illustrated above, there will be one decal (each side) with all of such lettering laid out in the appropriate places. Where the lettering is concentrated into a few well separated areas, separate decals will be provided for each such area.
- One or more decals for each end of the container. Again, the number of decals depends on how much lettering there is, and how closely it is grouped together. In the case illustrated above there are separate decals for each group of lettering.
- Depending on the amount of raised detail on your container it may be difficult to get the large decals to sit properly on your model (see below), so cutting guides are also provided (positioned where raised details are likely to cause a problem) to help you cut and apply the decal in sections. These guides are often linked (e.g. the loops top and bottom in the illustration above) to show the extent of the raised feature. In the illustration above, guides are provided for the door edges, the diagonal lifting straps, and the columns of vents.
- For larger decals with multiple lines of lettering, additional cutting guides will be provided between such lines so that you can apply each line separately if you wish.
As standard, at least one spare of each different decal will be included for you to experiment with, or in case of problems during application.
Where either all of the lettering and other markings are very dark (e.g. black), or the colour of the container where the decals are to be applied is white (or nearly so), the decals will be printed onto decal paper with a transparent backing (as illustrated above). For any other combination of container and markings colours the decals will be printed onto decal paper with a white backing film, and an appropriate background colour will be incorporated into the decals that is intended to match the colour of the container. The matching of the background colour needs to be very good if the edges of the decals are not to be readily visible, so you will be able to select from a range of specific paint colours for your decals.
The decal sheet will be up to A5 in size for ease of posting. Decals for the largest scales may need more than one sheet, and/or the decals may need to be divided into sections to fit.
Full instructions for applying my decals are available as a main guide here. A summary of the main guide will also be provided in printed form with your first order.
It is up to you whether you apply the side decals in one piece, as designed, or cut them into smaller sections. One-piece application is probably practical in the smaller scales, where raised surface detail on your model is sufficiently shallow to not cause problems with the sit or distortion of the decals. In the larger scales such detail is likely to be high/thick enough to significantly "shorten" a one piece decal because of the extra length needed to wrap it around the projections. It is therefore likely to be better to cut the decals into sections along the edges of such details. Where lettering or other livery elements crosses a cut, you will need to fill the resulting gap between decal sections with appropriate paint to link the livery elements on either side. Please see the application guides for more details of how to deal with surface features.
Please also note the following:
- The "© AardstormModels.com" watermark in the livery illustrations will not be present in the decals; it is there to discourage people downloading and printing my designs for themselves.
- The livery illustrations use different shades of the basic body colour to indicate raised surface detail: the darker the shade, the higher the surface. These shades will not be present in the decals; the background colour will be uniform, either of the matched paint colour or transparent. Where the difference in level could be sufficient to require the decal to be cut into sections, cutting guides will be provided along the appropriate edges.
- For decals with a background colour, the overall size of each decal is slightly enlarged, with cutting guides provided to mark the actual size. This reduces the risk of any slight misalignment of your cut resulting in the inclusion of white background.
- Plank edge and ironwork detail, as seen in the livery and container type illustrations, will not be present in the decals (unless sufficiently raised to require cutting guides). This is in case the details on your model don't exactly match those in the design.
- Important: The cutting guides for all ironwork and other features, including the overall lengths, widths and heights of the sides and ends, are set at typical positions for the container design you select. Before cutting the decals be sure to check that the corresponding features of your model match the marked positions, and adjust if necessary, especially where you intend to cut the decal.
Configure Your Decals
A set of decals for a single container will cost £ 9.50. Any additional sets (of whatever livery) you order at the same time qualify for my multiple decals disount and will cost £ 7.00 each. The discount will be applied in your basket.
To order a set of decals for a container you will need to configure its specification. This will consist of a number of steps, as described below.
To accommodate a wide range of scales, container dimensions are specified in scale feet and/or inches, rather than model mm. A calculator and look-up table to help convert scale inches into model dimensions (or vice versa) is available here (opens in new browser tab/window).
Note: If you want a set of decals for a container that is not covered by the standard options below, I will be happy to quote you for a customised set. Please contact me with full details.